1. Log in to the Day & Ross site
See: Quick Reference Guide - Logging in
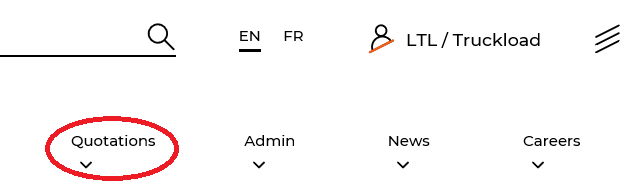
2. Scroll to the Quote Summary or: Select the Quotations option, found by selecting the menu icon at the top of your screen.
3. Select the Request A Quote option from the Quote Summary window

4. Select the Quote Type.
- Commercial - Both locations are in commercial locations
- Residential - Either location is a residential address
To ensure the correct quote type is selected, a checked off check box will be visible

5. Domestic Quote
- Type either the Town or the postal code in the address field
- Select the Payment Method
- Billing Information
- Select the Bill to account from the drop down menu
- Request details
- Input the correct contact email address
- Payment Method
- The only selection is defaulted to Prepaid
(Note: All fields with an asterix must have text in them, although you can enter in a few letters if you want to speed up the process)
(Note: This defaults to Prepaid, as it is the only method)

If you use an address more than once to create a quote (e.g. “Toronto Construction site”) save it as a contact. Enter a nickname at the top of your information, then select the + Add This Contact to my Address Book option at the bottom of your screen
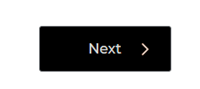
6. Select Next to proceed to Step 2 (Measurements)
7. Enter measurement information
- Item Count
- Item Weight
- Item Length
- Item Width
- Item Height
- Description
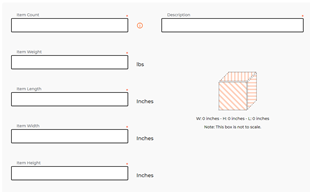
Item Count is the number of pieces the driver has to hand and we have to ship. Two pallets that have 500 boxes wrapped together would be “2.”
8. Click the Dangerous Good option if the items are dangerous goods

9. Select Save Item
- If required, select Add Another Item to add another item to your shipment

10. Select Next to move on to Step 3 (Accessorials)
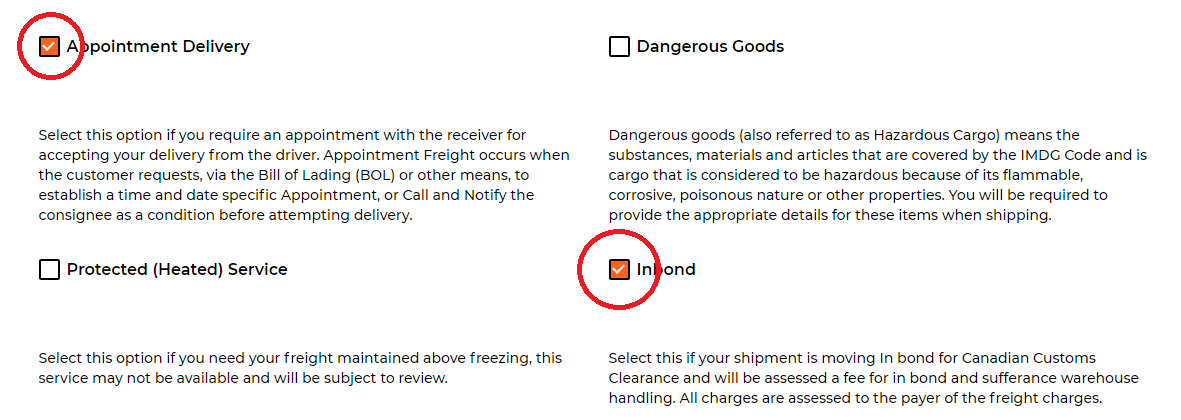
11. If required, select the box next to all required additional items (Accessorials)
- Descriptions of all accessorials can be found directly under the accessorial
12. Select Next to move on the Step 4 (Finalize)
14. Select Request Quote to move on to Step 5 (Your Quote)

15. A quote number has now been generated and will display at the top of the page

16. To proceed with shipping select Ship Now, located at the top of the page

17. To exit select Exit at the bottom of the page